This part fits the vehicle you selected:
My Vehicle: 5FNRL18614B121947 2004 Honda Odyssey 5 Door EX; KA 5AT
Change VehicleThe vehicle options this part fits:
- Mfg.Origin: USA
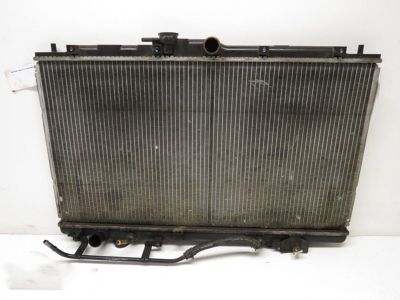
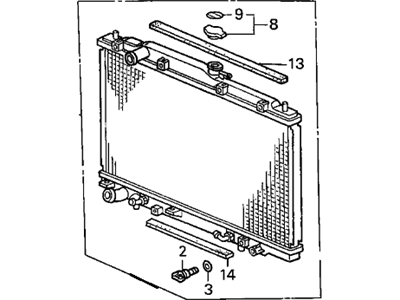
Honda 19010-P8F-A51 Radiator (Denso)
1999-2004 Honda Odyssey 19010P8FA51

- Part DescriptionRadiator Assembly
- ManufacturerHonda
- Manufacturer's NotesThis part is discontinued.
This part fits the vehicle you selected:
5FNRL18614B121947 2004 Honda Odyssey 5 Door EX; KA 5AT
The vehicle options this part fits:
- Mfg.Origin: USA
Product Specifications
| Brand | Genuine Honda |
| Manufacturer Part Number | 19010-P8F-A51 |
| Part Description | Radiator Assembly |
| Other Names | Radiator |
| Item Dimensions | 33.8 x 24.7 x 5.6 inches |
| Item Weight | 12.80 Pounds |
| Condition | New |
| Fitment Type | Direct Replacement |
| Manufacturer | Honda |
| SKU | 19010-P8F-A51 |
| Warranty | This genuine Honda part is guaranteed by Honda's factory warranty. |
| Shipping & Return | Shipping Policy Return Policy |
Warning: California’s Proposition 65
Customer Questions & Answers
- Q:Does this fit my car? Posted by HondaPartsNow Specialist
- A:You can Select Your Vehicle to check if 19010-P8F-A51 fits your vehicle.Posted by HondaPartsNow Specialist
- Q:How to remove and replace a radiator in a Honda Odyssey? Posted by Customer
- A:Disconnect the cable from the negative battery terminal. Set the parking brake and block the rear wheels. Raise the front of the vehicle and support it securely on jackstands. Remove the splash shield beneath the radiator. Drain the cooling system. If the coolant is relatively new or in good condition, save it and reuse it. Read the Warning. Remove the engine cooling fans. For 2005 and later models, drain the coolant. If it's in good condition, save it for reuse. Remove both fan assemblies. Disconnect both radiator hoses and the transmission cooler lines. Plug the transmission cooler openings to prevent contamination. Remove the two upper mounting brackets. Remove the hood latch. Carefully lift out the radiator. Don't spill coolant on the vehicle or scratch the paint. Inspect the radiator for leaks and damage. If it needs repair, have a radiator shop or dealer service department perform the work as special techniques are required. Bugs and dirt can be removed from the radiator by spraying with a garden hose nozzle from the back side. The radiator should be flushed out with a garden hose before reinstallation. Check the radiator mounts for deterioration and replace if necessary. Installation is the reverse of the removal procedure. Guide the radiator into the mounts until they seat properly. Tighten the radiator bracket bolts. After installation, fill the cooling system with the proper mixture of antifreeze and water. Reconnect the battery. Start the engine and check for leaks. Allow the engine to reach normal operating temperature, indicated by the lower radiator hose becoming hot. Recheck the coolant level and add more if required. Check and add transaxle fluid as needed.Posted by HondaPartsNow Specialist
If you have any questions about this product, please don't hesitate to ask us. We will be happy to help you!
Why choose Honda Parts Now
- Dedicated Service
Your complete satisfaction is our #1 goal
- Lowest Prices
Best deals on genuine OE parts from dealerships
- Fast Delivery
Orders are processed and delivered promptly

