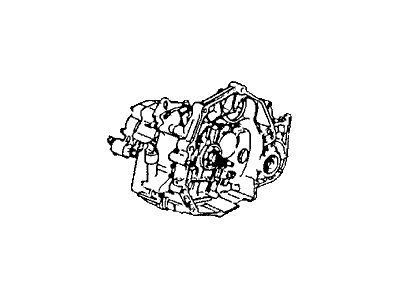
Genuine Honda Del Sol Transmission Assembly
Trans AssemblyEnter your vehicle info to find more parts and verify fitment
- Select Vehicle by VIN
- Select Vehicle by Model
Select by VIN
orEnter your VIN for the most accurate results.Enter your VIN for the most accurate results.
Select by Model
-- Select Model --
-- Select Year --
-- Select Body & Trim --
-- Select Emission & Transmission --
14 Transmission Assemblies found
Honda Del Sol Transmission Assembly
Part Number: 20011-P20-U40- Replaced by: 20011-P20-U42
$2882.01 MSRP: $3935.10You Save: $1053.09 (27%)Honda Del Sol Transmission Assembly (S20)
Part Number: 20011-P20-C50- Replaced by: 20011-P20-C51
$2882.01 MSRP: $3838.85You Save: $956.84 (25%)Honda Del Sol Transmission Assembly
Part Number: 20011-P21-A40- Replaced by: 20011-P21-A41
$2882.01 MSRP: $3838.85You Save: $956.84 (25%)Honda Del Sol Transmission Assembly (S20)
Part Number: 20011-P20-U42- Other Name: Transaxle
- Replaces: 20011-P20-U40, 20011-P20-U41
Honda Del Sol Transmission Assembly (Y21)
Part Number: 20011-P21-A41- Other Name: Transaxle
- Replaces: 20011-P21-A40
Honda Del Sol Transmission Assembly Parts Questions & Answers
- Q: How to remove and install a Honda Transmission?A: Disconnect the negative cable from the battery. Caution: If the radio in your vehicle is equipped with an anti-theft system, make sure you have the correct activation code before disconnecting the battery. Remove the resonator, intake air duct, and air cleaner housing. Remove the starter motor cables and cable bracket from the starter. Disconnect the transaxle ground cable from the transaxle. Unplug the electrical connector from the lock-up control solenoid. Unplug the speed sensor electrical connector. Remove the three upper transaxle-to-engine mounting bolts and the rear engine mounting bolt. Raise the vehicle and support it securely on jackstands. Drain the transmission fluid. Be sure to use a new sealing washer when you reinstall the drain plug. Disconnect the lower arms from the steering knuckles. Separate the driveaxles from the differential. Cover the inner CV joints with plastic bags to keep them clean. Remove the right damper fork. Remove the driveaxles. Remove the splash shield. Remove the elbow-shaped exhaust pipe section from underneath the engine. Remove the Shift Cable cover, then remove the control lever and shift cable. It's not necessary to disconnect the shift cable from the control lever. Remove the stopper mount. Disconnect the throttle control cable from the throttle control lever. Disconnect the transmission fluid cooler hoses from the cooler lines. Turn the hoses up to prevent fluid from flowing out, then plug the lines to prevent contamination. Remove the engine stiffener(s). Note: Only the D16Z6 uses a rear engine stiffener. Remove the torque converter access plate. Mark the relationship of the torque converter to the driveplate. Remove the eight torque converter-to-driveplate bolts one at a time by rotating the crankshaft pulley for access to each bolt. Remove the distributor mounting bolt, then attach an engine hoist to the engine. Place a transmission jack or a floor jack under the transaxle. Raise the transaxle assembly just enough to take the load off the transaxle mount. Remove the transaxle side mount. Remove the lower transaxle-to-engine bolt, the lower engine-to-transaxle bolt, and the rear engine mount bolts. Move the transaxle back to disengage it from the engine block dowel pins and make sure the torque converter is detached from the driveplate. Secure the torque converter to the transaxle so it will not fall out during removal. Lower the transaxle from the vehicle. Note: It may be necessary to slowly lower the jack supporting the engine while the jack supporting the transaxle is being lowered. This will provide more clearance between the transaxle and the body.Installation: Honda recommends flushing the transmission cooler and the cooler hoses and lines with solvent whenever the transmission is removed from the vehicle. Use an approved solvent, such as Honda J- 35944-20 or equivalent. Flush the lines and fluid cooler thoroughly and make sure no solvent remains in the lines or cooler after flushing. Install the starter motor. Prior to installation, make sure that the torque converter hub is securely engaged in the pump. With the transaxle secured to the jack, raise it into position. Be sure to keep it level so the torque converter does not slide out. Turn the torque converter to line it up with the driveplate. The marks you made on the torque converter and the driveplate must line up. Make sure the two dowel pins are still installed, then move the transaxle forward carefully until the dowel pins and the torque converter are engaged. Install the lower transaxle-to-engine bolt and the lower engine-to-transaxle bolt. Tighten them to the torque. Caution: Don't use the bolts to force the transaxle and engine together. If the transaxle doesn't slide easily up against the engine, find out why before you tighten the bolts. The remainder of installation is the reverse of removal. Refill the transaxle with fluid to the specified level. Note that the transaxle may require more fluid than in a normal fluid and filter change since the torque converter may be empty. Start the engine, set the parking brake, and shift the transaxle through all gears three times. Make sure the shift cable is working properly. Check and, if necessary, adjust the ignition timing. Allow the engine to reach its proper operating temperature with the transaxle in Park or Neutral, then turn it off and check the fluid level. Road test the vehicle and check for fluid leaks.


