×
- Hello
- Login or Register
- Quick Links
- Live Chat
- Track Order
- Parts Availability
- RMA
- Help Center
- Contact Us
- Shop for
- Honda Parts
- Honda Accessories
My Garage
My Account
Cart
This part fits
2005 Honda Odyssey (VIN: 5FNRL38685B066796) 5 Door EXL; KA 5AT
Check another vehicle- Mfg.Origin: USA
Honda 31100-RYP-A01 Alternator Assembly (Csd30) (Denso)
2005-2008 Honda 31100RYPA01
Customer Questions & Expert Answers (2) (Denso)")
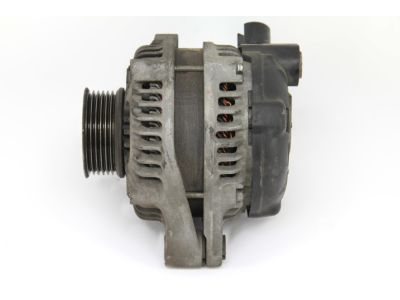
- Part DescriptionAlternator
- Replaces
- ManufacturerHonda
This part fits
2005 Honda Odyssey (VIN: 5FNRL38685B066796) 5 Door EXL; KA 5AT
Check another vehicle- Mfg.Origin: USA
$515.19 MSRP: $743.42
You Save: $228.23 (31%)
1
- Related Parts
- Product Specifications
- Customer Questions & Expert Answers
Product Specifications
Brand Genuine Honda Manufacturer Part Number 31100-RYP-A01 Part Description Alternator Item Dimensions 9.9 x 8.7 x 7.6 inches Item Weight 13.30 Pounds Condition New Fitment Type Direct Replacement Replaces 31100-RGM-A01 Manufacturer Honda SKU 31100-RYP-A01 Warranty This genuine Honda part is guaranteed by Honda's factory warranty. Shipping & Return Shipping Policy Return Policy Warning: California's Proposition 65Customer Questions & Expert Answers
- Q:I would like to make sure that this is the correct fit for my car Posted by HondaPartsNow Specialist
- A:You can Select Your Vehicle to check if 31100-RYP-A01 fits your vehicle.Posted by HondaPartsNow Specialist
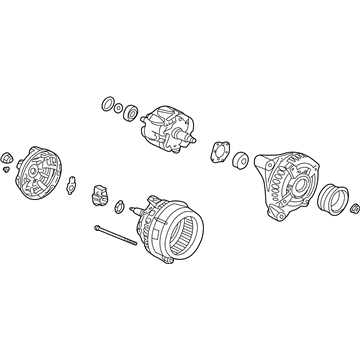
- Q:How to remove and install an alternator in the Honda Odyssey? Posted by Customer
- A:Disconnect the cable from the negative battery terminal. On later models, remove the grille cover to access the alternator, if necessary. Remove the drivebelt. Disconnect the wiring from the alternator. Detach the interfering wiring brackets and retainers from the alternator. On 2005 and later models, the wiring will have to be disconnected from the air conditioning compressor as well. On 2005 and later models, remove the windshield washer reservoir. Pull up on the power steering fluid reservoir to detach it from its mounting bracket on the right inner wheelhousing, push it aside to provide sufficient clearance, then remove the alternator. If you're replacing the alternator, take the old one with you when purchasing the replacement unit. Make sure that the new/rebuilt unit looks identical to the old alternator. Many new/rebuilt alternators DO NOT have a pulley installed, so you might have to swap the pulley from the old unit to the new/rebuilt one. When buying an alternator, find out the store's policy regarding pulley swaps. Installation is the reverse of removal. Be sure to tighten the alternator mounting bolts to the torque. Tighten the harness clamp bolt securely. After the alternator is installed, install the accessory drivebelt. Reconnect the cable to the negative terminal of the battery. Check the charging voltage to verify that the alternator is operating correctly.Posted by HondaPartsNow Specialist
If you have any questions about this product, please don't hesitate to ask us. We will be happy to help you!- Q:
Why choose Honda Parts Now
- Dedicated Service
Your complete satisfaction is our #1 goal
- Lowest Prices
Best deals on genuine OE parts from dealerships
- Fast Delivery
Orders are processed and delivered promptly