Make sure this part fits your vehicle

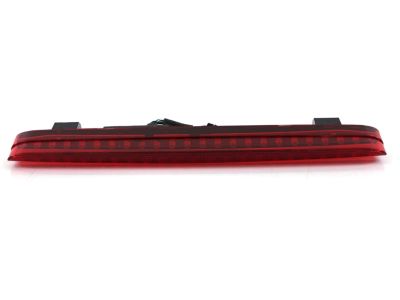
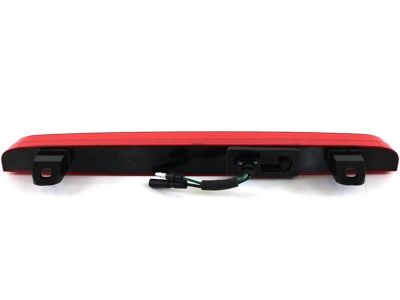
Honda 08F13-S30-0M110 Lamp Assy., Stop

1997-2015 Honda 08F13S300M110

Honda 08F13-S30-0M110 Lamp Assy., Stop
  • Part Description
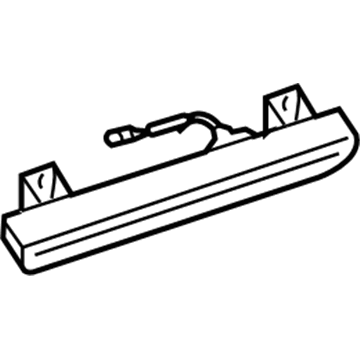
    High Mount Lamp
  • Replaces
    08F13-S30-0M010, 08F13-S30-0M001
  • Manufacturer
    Honda
Customer Questions & Answers
$114.53 MSRP: $161.78
You Save: $47.25 (30%)
1
ADD TO CART
  • Product Specifications

    BrandGenuine Honda
    Manufacturer Part Number08F13-S30-0M110
    Part DescriptionHigh Mount Lamp
    Other NamesStop Lamp
    Item Dimensions14.2 x 3.6 x 1.5 inches
    Item Weight0.40 Pounds
    ConditionNew
    Fitment TypeDirect Replacement
    Replaces08F13-S30-0M010, 08F13-S30-0M001
    ManufacturerHonda
    SKU08F13-S30-0M110
    WarrantyThis genuine Honda part is guaranteed by Honda's factory warranty.
    Shipping & ReturnShipping Policy Return Policy
    Warning: California’s Proposition 65
  • Vehicle Fitment

    Year Make Model Body & Trim Emission & Transmission
    2012 Honda Accord2 Door EX, 2 Door EX-L, 2 Door LX-S, 4 Door EX, 4 Door EX-L, 4 Door EX-L V6, 4 Door EX-V6, 4 Door LX, 4 Door SEKA 5AT, KA 5MT, KL 5AT, KL 5MT
    2011 Honda Accord2 Door EX, 2 Door EX-L, 2 Door LX-S, 4 Door EX, 4 Door EX (PZEV), 4 Door EX-L, 4 Door EX-L (PZEV), 4 Door EX-L V6, 4 Door EX-V6, 4 Door LX, 4 Door LX (PZEV), 4 Door SE, 4 Door SE (PZEV)KA 5AT, KA 5MT, KL 5AT, KL 5MT
    2010 Honda Accord2 Door EX, 2 Door EX-L, 2 Door LX-S, 4 Door EX, 4 Door EX (PZEV), 4 Door EX-L, 4 Door EX-L (PZEV), 4 Door EX-L V6, 4 Door EX-V6, 4 Door LX, 4 Door LX (PZEV)KA 5AT, KA 5MT, KL 5AT, KL 5MT
    2009 Honda Accord2 Door EX, 2 Door EX-L, 2 Door LX-S, 4 Door EX, 4 Door EX (PZEV), 4 Door EX-L, 4 Door EX-L (PZEV), 4 Door EX-L V6, 4 Door EX-V6, 4 Door EX-V6 (PZEV), 4 Door LX, 4 Door LX (PZEV)KA 5AT, KA 5MT, KL 5AT, KL 5MT
    2008 Honda Accord2 Door EX, 2 Door EX-L, 2 Door LX, 4 Door EX, 4 Door EX (PZEV), 4 Door EX-L, 4 Door EX-L (PZEV), 4 Door EX-L V6, 4 Door EX-V6, 4 Door EX-V6 (PZEV), 4 Door LX, 4 Door LX (PZEV)KA 5AT, KA 5MT, KL 5AT, KL 5MT
    2005 Honda Accord2 Door EX, 2 Door EX (V6), 2 Door EX-L, 2 Door LX, 2 Door LX (V6), 4 Door DX, 4 Door EX, 4 Door EX (V6), 4 Door EX-L, 4 Door LX, 4 Door LX (V6)KA 5AT, KA 5MT, KA 6MT, KL 5AT, KL 6MT
    2004 Honda Accord2 Door EX, 2 Door EX (V6), 2 Door EX-L, 2 Door LX, 2 Door LX (V6), 4 Door DX, 4 Door EX, 4 Door EX (V6), 4 Door EX-L, 4 Door LX, 4 Door LX (V6)KA 5AT, KA 5MT, KA 6MT, KL 5AT, KL 6MT
    2003 Honda Accord2 Door EX, 2 Door EX (V6), 2 Door EX-L, 2 Door LX, 2 Door LX (V6), 4 Door DX, 4 Door EX, 4 Door EX (V6), 4 Door EX-L, 4 Door LX, 4 Door LX (V6)KA 5AT, KA 5MT, KA 6MT, KL 5AT, KL 6MT
    2002 Honda Accord2 Door EX, 2 Door EX (V6), 2 Door LX, 2 Door LX (V6), 2 Door SEKA 4AT, KA 5MT, KL 4AT, KL 5MT
    2001 Honda Accord2 Door EX, 2 Door EX (V6), 2 Door LX, 2 Door LX (V6)KA 4AT, KA 5MT, KL 4AT, KL 5MT
    View More

Customer Questions & Answers

Q:
Can you verify fitment? Posted by HondaPartsNow Specialist
A:
You can Select Your Vehicle to check if 08F13-S30-0M110 fits your vehicle.
Posted by HondaPartsNow Specialist
Q:
How to remove and install Headlights,Brake Light,Dome Light,Fog Light and Marker Lights? Posted by Customer
A:
Headlights REMOVAL & INSTALLATION Locate the headlight bulb that needs to be replaced. It may be necessary to remove a component or the composite headlight assembly to gain access to the bulbs. Turn the headlights off. Detach the two-prong connector from the base of the headlight bulb. Twist the bulb counterclockwise to unlock it from the headlight housing, then carefully withdraw the bulb from the housing. To install, install a new bulb into the headlight housing, then turn it to lock it into place. Attach the 2-prong connector to the bottom of the bulb. Turn the headlight switch on to make sure the bulb works, then turn the switch off. Install any components that were removed to get to the headlight bulb. AIMING THE HEADLIGHTS The headlights must be properly aimed to provide the best, safest road illumination. The lights should be checked for proper aim and adjusted as necessary. Certain state and local authorities have requirements for headlight aiming; these should be checked before adjustment is made. CAUTION About once a year, when the headlight assemblies are replaced or any time front-end work is performed on your vehicle, the headlight should be accurately aimed by a reputable repair shop using the proper equipment. Headlights not properly aimed can make it virtually impossible to see and may blind other drivers on the road, possibly causing an accident. Note that the following procedure is a temporary fix, until you can take your vehicle to a repair shop for a proper adjustment. Headlight adjustment may be temporarily made using a wall, as described below, or on the rear of another vehicle. When adjusted, the lights should not glare in oncoming car or truck windshields, nor should they illuminate the passenger compartment of vehicles driving in front of you. These adjustments are rough and should always be fine-tuned by a repair shop equipped with headlight aiming tools. Improper adjustments may be both dangerous and illegal. Because the composite headlight assembly is bolted into position, no adjustment should be necessary or possible. Some applications, however, may be bolted to an adjuster plate or may be retained by adjusting screws. If so, follow this procedure when adjusting the lights, BUT always have the adjustment checked by a reputable repair shop. Before removing the headlight bulb or disturbing the headlamp in any way, note the current settings to ease headlight adjustment upon reassembly. If the high or low beam setting of the old lamp still works, this can be done using the wall of a garage or a building. Park the vehicle on a level surface with the fuel tank about full and with the vehicle empty of all extra cargo (unless normally carried). The vehicle should be facing a wall no less than 6 feet (1.8m) high and 12 feet (3.7m) wide. The front of the vehicle should be about 25 feet from the wall. If aiming is to be performed outdoors, it is advisable to wait until dusk to properly see the headlight beams on the wall. If done in a garage, darken the area around the wall as much as possible by closing shades or hanging cloth over the windows. Turn the headlights ON and mark the wall at the center of each light's low beam, then switch on the brights and mark the center of each light's high beam. A short length of masking tape, which is visible from the front of the vehicle, may be used. Although marking all four positions is advisable, marking one position from each light should be sufficient. If neither beam on one side is working, and if another like-sized vehicle is available, park the second one in the exact spot where the vehicle was and mark the beams using the same-side light. Then switch the vehicles so the one to be aimed is back in the original spot. It must be parked no closer to or farther away from the wall than the second vehicle. Perform any necessary repairs, but make sure the vehicle is not moved or is returned to the exact spot from which the lights were marked. Turn the headlights ON and adjust the beams to match the marks on the wall. Have the headlight adjustment checked as soon as possible by a reputable repair shop. Signal and Marker Lights REMOVAL & INSTALLATION Front Turn Signal and Parking Lights Remove the negative battery cable. Remove the screw from the front turn signal/parking light lens. Pull the front turn signal light assembly from the front bumper. Detach the 2-prong connector. To remove the bulb socket from the light assembly, turn the socket 45 degrees counter-clockwise. Remove the bulb. To install, inspect the bulb socket for corrosion or damage. Install a new bulb into the holder. The remainder of the installation procedure is the reverse of removal. To ensure that the replacement bulb functions properly, activate the applicable switch to illuminate the bulb which was just replaced. If the replacement light bulb does not illuminate, either it is faulty or there is a problem in the bulb circuit or switch. Correct as necessary. Front Turn Signal/Side Marker Light. Remove the screw(s) from the front turn signal/side marker light assembly. Pull the lens assembly from the front bumper. Detach the two-prong electrical connector from the light. To remove the turn signal/side marker bulb(s), press in slightly and turn counter-clockwise to release the bulb(s). Installation is the reverse of the removal procedure. To ensure that the replacement bulb functions properly, activate the applicable switch to illuminate the bulb which was just replaced. If the replacement light bulb does not illuminate, either it is faulty or there is a problem in the bulb circuit or switch. Correct as necessary. Rear Turn Signal, Brake and Parking Lights EXCEPT ACCORD WAGON Open the trunk. Either carefully pry off the rear light trim covers, or unfasten the retainers then remove the trim covers. If necessary, you can unplug the electrical connector from the bulb assembly. Remove the bulb socket from the light assembly by turning it counterclockwise 4 of a turn. To remove the bulb, carefully pull it straight out of the socket. Installation is the reverse of the removal.
Posted by HondaPartsNow Specialist
If you have any questions about this product, please don't hesitate to ask us. We will be happy to help you!

Genuine Honda Part 08F13-S30-0M110, the Right Choice

Your vehicle deserves only genuine OEM Honda parts and accessories. To ensure reliability, purchase Honda part # 08F13-S30-0M110 Lamp Assy., Stop. It is sometimes referred to as Honda Brake Light. Our Honda parts and accessories are expedited directly from authorized Honda dealers strategically located all across the U.S. and are backed by the manufacturer's 12 month, 12,000 mile warranty. OEM Honda parts are the best for restoring your vehicle to factory condition performance. This part fits 1998-2012 Honda Accord, 2001-2015 Honda Civic, 1997-2001 Honda Prelude.

Affordable, reliable and built to last, Honda part # 08F13S300M110 Lamp Assy., Stop stands out as the smart option. HondaPartsNow.com is your prime online source with the biggest and best selection of genuine Honda parts and accessories at giant discounted prices. We have the OEM Honda parts and accessories you need at the wholesale prices. HondaPartsNow.com has you covered no matter what type of Honda vehicle you drive.

Why choose Honda Parts Now

  • Dedicated Service

    Your complete satisfaction is our #1 goal

  • Lowest Prices

    Best deals on genuine OE parts from dealerships

  • Fast Delivery

    Orders are processed and delivered promptly