×
- Hello
- Login or Register
- Quick Links
- Live Chat
- Track Order
- Parts Availability
- RMA
- Help Center
- Contact Us
- Shop for
- Honda Parts
- Honda Accessories

My Garage
My Account
Cart
This part fits
2000 Honda Accord (VIN: 1HGCG6679YA132147) 4 Door EX; KL 4AT
Check another vehicle- Mfg.Origin: USA
Honda 36531-PAA-307 Sensor, Air/Fuel
1998-2000 Honda Accord 36531PAA307
Customer Questions & Expert Answers (4)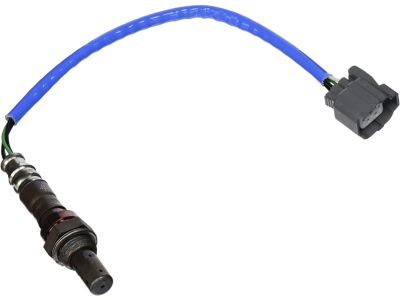
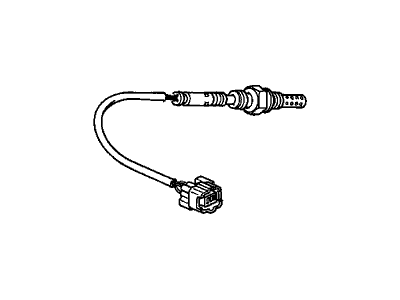
- Part DescriptionFront Oxygen Sensor
- Replaces
- ManufacturerHonda
This part fits
2000 Honda Accord (VIN: 1HGCG6679YA132147) 4 Door EX; KL 4AT
Check another vehicle- Mfg.Origin: USA
$293.90 MSRP: $429.68
You Save: $135.78 (32%)
1
- Related Parts
- Specifications
- Q&A
Product Specifications
Brand Genuine Honda Manufacturer Part Number 36531-PAA-307 Part Description Front Oxygen Sensor Other Names Oxygen Sensor Item Dimensions 8.6 x 2.3 x 2.3 inches Item Weight 0.30 Pounds Condition New Fitment Type Direct Replacement Replaces 36531-PAA-L23, 36531-PAA-L21, 36531-PAA-L22 Manufacturer Honda SKU 36531-PAA-307 Warranty This genuine Honda part is guaranteed by Honda's factory warranty. Shipping & Return Shipping Policy Return Policy Warning: California's Proposition 65Customer Questions & Expert Answers
- Installation & Repair Tips by AI Expert
- Removal steps 1. Park on level ground, set the parking brake, block wheels, wear eye protection and gloves, and allow the exhaust to cool. 2. Raise and support the vehicle with jack stands if the sensor is not reachable from above. 3. Disconnect the negative battery terminal to isolate electrical circuits. 4. Locate the oxygen sensor in the exhaust system - exact position varies by design. 5. Release and separate the sensor electrical connector by pressing the lock tab; free any harness clips or retainers. 6. Spray penetrating oil on the sensor threads and let it soak if the sensor is corroded or seized. 7. Use an oxygen-sensor socket or appropriate wrench, support the harness, and turn the sensor counterclockwise to loosen - avoid twisting the wiring. 8. Remove the sensor from the exhaust and inspect the connector and wiring for damage. Installation steps 1. Verify the replacement sensor matches the original type and connector. 2. If the new sensor is not pre-coated, apply a very small amount of sensor-safe anti-seize to the threads only; do not contaminate the sensor tip or electrical contacts. 3. Thread the sensor into the exhaust by hand first to avoid cross-threading. 4. Tighten the sensor with an oxygen-sensor socket until snug; do not overtighten. 5. Reconnect the electrical connector, route the harness away from hot or moving parts, and secure any clips or shields removed earlier. 6. Reinstall any removed components, lower the vehicle, and reconnect the negative battery terminal. 7. Start the engine, check for exhaust leaks and correct sensor operation, and scan/clear codes if needed to verify the repair. 8. Repair tip: an oxygen-sensor socket (slotted) makes installation/removal much easier; replace the wiring or connector if damaged rather than reusing compromised parts.
- Q:the part fit in my honda accord sedan 1999, I did check the other web side honda part they said this part did not fit on my car Posted by Tai L. / 1999 Honda Accord
- A:By VIN number 36531-PAA-307 is the Air Fuel Ratio Sensor that fits your car. You have a UL (ultra Low) emission vehicle.Answered by Honda Parts Specialist David / Apr 02, 2019
- Q:I need to replace the following parts on my 1999 Honda Accord LX Part #36531-paa-307 AND Part #36532-paa-L02. Are these O2 sensors heated or non-heated? Posted by Jim P. / 1999 Honda Accord
- A:it seems as if these are both heated sensors.Answered by Honda Parts Specialist Aaron / Nov 25, 2016
- Q:Can you please provide the length of the wires on this oxygen sensor? Posted by Terrence C. / 2000 Honda Accord
- A:WIRE LOOKS 2 BE 10.5" LONGAnswered by Honda Parts Specialist Aaron / Aug 29, 2016