×
- Hello
- Login or Register
- Quick Links
- Live Chat
- Track Order
- Parts Availability
- RMA
- Help Center
- Contact Us
- Shop for
- Honda Parts
- Honda Accessories

My Garage
My Account
Cart
Genuine 1997 Honda Passport Cylinder Head
Head- Select Vehicle by Model
- Select Vehicle by VIN
Select Vehicle by Model
orMake
Model
Year
Select Vehicle by VIN
For the most accurate results, select vehicle by your VIN (Vehicle Identification Number).
3 Cylinder Heads found
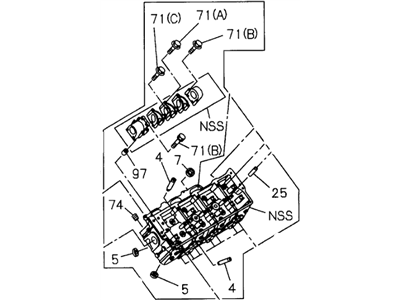
 Product Specifications
- Other Name: Cylinder Head
- Replaces: 8-97104-323-0
- Item Weight: 20.70 Pounds
- Item Dimensions: 19.9 x 11.1 x 9.5 inches
- Condition: New
- Fitment Type: Direct Replacement
- Require Quantity: 2
- SKU: 8-97137-198-0
- Warranty: This genuine part is guaranteed by Honda's factory warranty.
 Product Specifications
- Position: Driver Side
- Item Weight: 27.00 Pounds
- Item Dimensions: 19.3 x 10.7 x 8.8 inches
- Condition: New
- Fitment Type: Direct Replacement
- SKU: 8-97186-702-0
- Warranty: This genuine part is guaranteed by Honda's factory warranty.
- Product Specifications
- Position: Passenger Side
- Item Weight: 29.00 Pounds
- Item Dimensions: 19.6 x 11.1 x 9.5 inches
- Condition: New
- Fitment Type: Direct Replacement
- SKU: 8-97186-701-0
- Warranty: This genuine part is guaranteed by Honda's factory warranty.
1997 Honda Passport Cylinder Head
Our website is the optimal online store for when you need any genuine 1997 Honda Passport Cylinder Head. We offer a wide range of 1997 Honda Passport Cylinder Head at unbeatable prices. We will help provide you with a worry-free shopping experience at highly competitive prices. In addition, all OEM parts are backed by the manufacturer's warranty.
1997 Honda Passport Cylinder Head Parts Questions & Experts Answers
- Q:How should the Cylinder Head be prepared for reassembly after valve servicing on a 1997 Honda Passport?Posted by Leora C.A:Regardless of whether the head was sent to an automotive repair shop for valve servicing, ensure it is clean before beginning reassembly. If the head was sent out for valve servicing, the valves and related components will already be in place, allowing you to start the reassembly procedure with the installation of valve spring seats, where applicable, prior to valve seal installation. Some models may also have seal protectors that should be installed if applicable. New seals must be installed on each of the valve guides, with intake valve seals requiring a special tool or an appropriate-size deep socket for installation. Gently tap each valve seal into place until seated, taking care not to damage them by hammering once they are seated or twisting them during installation. Apply moly-base grease or engine assembly lube to the first valve and install it in the head, ensuring the new valve guide oil seal remains undamaged. Set the retainer and keepers in place, then check the installed spring height by measuring the distance between the top of the spring seat(s) and the underside of the retainer, comparing it to the specified installed height and adding shims if necessary. After establishing the correct height, remove the keepers and retainer to install the valve springs, ensuring the graduated pitch of the spring is oriented correctly with the narrow-pitch end against the cylinder head. Compress the springs and retainer with a valve spring compressor, then slip the keepers into place, ensuring they are seated completely in the valve stem groove, using grease if necessary to hold them in place during the release of the compressor. Double-check the installed valve spring height for each valve, ensuring it remains within specified limits, and if adjustments are needed, install more shims without allowing the installed height to fall below specifications. For a four-cylinder engine, valves should be adjusted cold, and the head should be stored in a clean plastic bag until ready for installation.Answered by Honda Parts Specialist Jacob / Mar 15, 2023
Related 1997 Honda Passport Parts
 1997 Honda Passport Timing Cover
 1997 Honda Passport Cylinder Head Gasket
 1997 Honda Passport Rocker Arm
 1997 Honda Passport Camshaft
 1997 Honda Passport Rocker Shaft Spring Kit