×
- Hello
- Login or Register
- Quick Links
- Live Chat
- Track Order
- Parts Availability
- RMA
- Help Center
- Contact Us
- Shop for
- Honda Parts
- Honda Accessories
My Garage
My Account
Cart
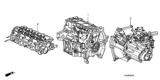
Genuine 2008 Honda Fit Transmission Assembly
Trans Assembly- Select Vehicle by Model
- Select Vehicle by VIN
Select Vehicle by Model
orMake
Model
Year
Select Vehicle by VIN
For the most accurate results, select vehicle by your VIN (Vehicle Identification Number).
3 Transmission Assemblies found

 Product Specifications
- Other Name: Transaxle
- Replaces: 20011-RMJ-G40
- Item Weight: 76.50 Pounds
- Item Dimensions: 27.9 x 24.7 x 21.3 inches
- Condition: New
- Fitment Type: Direct Replacement
- SKU: 20011-RMJ-G41
- Warranty: This genuine part is guaranteed by Honda's factory warranty.
- Product Specifications
- Item Weight: 175.00 Pounds
- Item Dimensions: 28.2 x 22.9 x 21.5 inches
- Condition: New
- Fitment Type: Direct Replacement
- SKU: 20021-RMM-010
- Warranty: This genuine part is guaranteed by Honda's factory warranty.
- Product Specifications
- Other Name: Transaxle
- Item Weight: 181.60 Pounds
- Item Dimensions: 25.8 x 23.6 x 20.5 inches
- Condition: New
- Fitment Type: Direct Replacement
- SKU: 20021-RMM-000
- Warranty: This genuine part is guaranteed by Honda's factory warranty.
2008 Honda Fit Transmission Assembly
Our website is the optimal online store for when you need any genuine 2008 Honda Fit Transmission Assembly. We offer a wide range of 2008 Honda Fit Transmission Assembly at unbeatable prices. We will help provide you with a worry-free shopping experience at highly competitive prices. In addition, all OEM parts are backed by the manufacturer's warranty.
2008 Honda Fit Transmission Assembly Parts Questions & Experts Answers
- Q: How to remove and install the Transmission Assembly on a 2008 Honda Fit?A: To remove the transaxle, first raise the vehicle and support it securely on a hoist or jackstands. Remove the engine undercover and drain the lubricant from the transaxle. For 2009 and later models, take off the wiper arms and upper and lower cowl covers. Next, remove the battery and battery tray, followed by the air filter housing and its mounting bracket for 2009 and later models. Detach the two bolts securing the clutch release cylinder to the transaxle, and if equipped, remove the bolt for the clutch line bracket, positioning the cylinder carefully to avoid bending the hard line. Disconnect the back-up lamp switch connector, then remove the three bolts securing the shift cable bracket to the transaxle, along with the spring clips or cotter pins and washers for the shift cables, and secure the cables to the side. For 2008 and earlier models, disconnect the Vehicle Speed Sensor connector. Attach an engine support fixture to the engine at the transaxle end, using a bolt if necessary. Remove the upper transaxle-to-engine bellhousing bolt under the radiator hoses, and for 2008 and earlier models, remove the lower starter bolt. For 2009 and later models, take off the transaxle mount bracket. Remove the left and right driveaxles, followed by the three bolts and the flywheel inspection plate from the transaxle. For 2008 and earlier models, remove the subframe and the front and rear transaxle mounts, along with the air filter bracket bolts after removing the front mount. Support the transaxle with a floor jack, preferably one with a transmission adapter head, and secure it with chains or straps. For 2009 and later models, remove the roll restrictor and its mounting bracket, and for 2008 and earlier models, take off the upper transaxle mount bracket. Remove the five remaining transaxle-to-engine mounting bolts, organizing them for reinstallation. Check for any remaining wiring harness clips or connectors and remove them. Separate the transaxle from the engine to clear the clutch pressure plate, then lower the transaxle. If necessary, remove the clutch components. For installation, if the clutch components were removed, install them and check the condition of the dowel pins in the engine block, replacing any that are damaged. Raise the transaxle to installation height and slide it towards the engine, ensuring proper alignment with the dowel pins and input shaft. Install and tighten the transaxle housing-to-engine bolts in the correct holes, and complete the installation by reversing the removal steps, filling the transaxle with the proper lubricant.
Related 2008 Honda Fit Parts
 2008 Honda Fit Torque Converter
 2008 Honda Fit Valve Body
 2008 Honda Fit Side Cover Gasket
 2008 Honda Fit Transmission Gasket