×
- Hello
- Login or Register
- Quick Links
- Live Chat
- Track Order
- Parts Availability
- RMA
- Help Center
- Contact Us
- Shop for
- Honda Parts
- Honda Accessories
My Garage
My Account
Cart
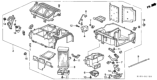
Genuine Honda Civic Heater Core
HVAC Heater Core- Select Vehicle by Model
- Select Vehicle by VIN
Select Vehicle by Model
orMake
Model
Year
Select Vehicle by VIN
For the most accurate results, select vehicle by your VIN (Vehicle Identification Number).
18 Heater Cores found


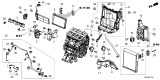
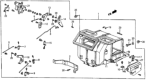
Honda Civic Heater Core Sub-Assembly
Part Number: 79110-SNE-A01$118.39 MSRP: $168.65You Save: $50.26 (30%)

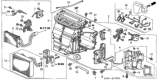
Honda Civic Set, Core Heater S
Part Number: 79119-TBA-A11$108.50 MSRP: $153.25You Save: $44.75 (30%)

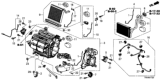
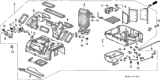
Honda Civic Heater Core Sub-Assembly
Part Number: 79115-TR6-A01$97.23 MSRP: $137.33You Save: $40.10 (30%)

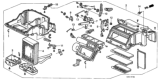
Honda Civic Heater Core Sub-Assembly
Part Number: 79110-SNA-A01$454.82 MSRP: $656.31You Save: $201.49 (31%)
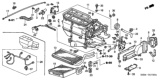
Honda Civic Heater Core Sub-Assembly
Part Number: 79115-TS8-A02$94.72 MSRP: $133.78You Save: $39.06 (30%)

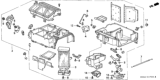
Honda Civic Heater Core Sub-Assembly
Part Number: 79115-TR0-A02$428.70 MSRP: $618.62You Save: $189.92 (31%)Honda Civic Heater Core Sub-Assembly
Part Number: 79115-TR3-Y01$117.50 MSRP: $167.38You Save: $49.88 (30%)Honda Civic Heater Core Sub-Assembly
Part Number: 79115-TR3-A02$117.50 MSRP: $167.38You Save: $49.88 (30%)Honda Civic Set, Core Heater Sub
Part Number: 79115-TS8-Y01$166.33 MSRP: $236.93You Save: $70.60 (30%)


Honda Civic Heater Core
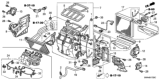
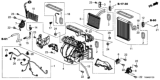
The Heater Core in Honda Civic automobiles is very important in the proper functioning of the climate control system as it provides warm air in the car when the heater is on. Like a car radiator it works a combination of water and antifreeze to transfer additional engine heat into the car interior. Made from aluminum or brass, the Honda Civic Heater Core has fins for better heat conductivity and a fan blows air through it to warm the interior of car. While some models of Honda Civics use Heater Core that employs check valves for controlling the flow of the coolant, others are more elaborative models that employ electromechanical actuators for accurate control of the temperature. Even more specialized models allow the user of each side to set a different climate for personal comfort. Some of the Heater Core problems include blockage, leakage, and corrosion and this makes repair work to be challenging since it requires disconnection of the dashboard.
In search of affordable OEM Honda Civic Heater Core? Consider browsing through our extensive inventory of genuine Honda Civic Heater Core. Not only do we provide market-leading prices and a manufacturer's warranty, but we also pride ourselves on exceptional customer service and swift delivery.
Honda Civic Heater Core Parts Questions & Experts Answers
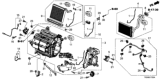
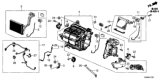
- Q: How to typical heater core remove in Honda Civic?A:Start by deflating your Civic's air conditioning system if you have it, before moving on with heater core replacement. Remove the cable from the negative terminal of the battery and let all the coolant flow out. At the front of the vehicle, unscrew the bolts holding the air conditioning lines in place, then use the special tools to disconnect the dash end of these lines from the vapor regulator valve (TXV) and disconnect the heater hoses from the heater core. Take off the heater control unit nut under the hood, being careful not to hit the fuel or brake tubes along the way. Start by disconnecting the instrument panel. Then remove the Blower Motor and power transistor electrical connections. Afterwards, take out the heater/air conditioning assembly bolts, also disconnecting the electrical connections before you can pull it out. Unroll the carpet and disconnect the evaporator drain hose from its mounting point on the firewall. Unscrew and disconnect the blower unit from the heater/air conditioning housing component. Remove the heater duct screw and duct from the passenger side, then take out the heater core cover screws that are connected to the expansion valve cover. First, disconnect any fasteners holding the expansion valve cover, and when present, remove the seal. Afterwards, unscrew the heater pipe bracket screw and loosen brackets. During installation, put the heater cover back on the heating and air conditioning unit while you reconnect the hose connections at the firewall. Finish by joining everything again - plug in the battery, refuel your cooling system, give your AC shop a call to recover, check for leaks, and reload air.

Related Honda Civic Parts


Browse by Year
2026 Heater Core 2025 Heater Core 2024 Heater Core 2023 Heater Core 2022 Heater Core 2021 Heater Core 2020 Heater Core 2019 Heater Core 2018 Heater Core 2017 Heater Core 2016 Heater Core 2015 Heater Core 2014 Heater Core 2013 Heater Core 2012 Heater Core 2011 Heater Core 2010 Heater Core 2009 Heater Core 2008 Heater Core 2007 Heater Core 2006 Heater Core 2005 Heater Core 2004 Heater Core 2003 Heater Core 2002 Heater Core 2001 Heater Core 2000 Heater Core 1999 Heater Core 1998 Heater Core 1997 Heater Core 1996 Heater Core 1995 Heater Core 1994 Heater Core 1993 Heater Core 1992 Heater Core 1991 Heater Core 1990 Heater Core 1989 Heater Core 1988 Heater Core 1987 Heater Core 1986 Heater Core 1985 Heater Core 1984 Heater Core 1983 Heater Core 1982 Heater Core 1981 Heater Core 1980 Heater Core