×
- Hello
- Login or Register
- Quick Links
- Live Chat
- Track Order
- Parts Availability
- RMA
- Help Center
- Contact Us
- Shop for
- Honda Parts
- Honda Accessories

My Garage
My Account
Cart
Genuine Honda Passport Ball Joint
Control Arm Joint- Select Vehicle by Model
- Select Vehicle by VIN
Select Vehicle by Model
orMake
Model
Year
Select Vehicle by VIN
For the most accurate results, select vehicle by your VIN (Vehicle Identification Number).
3 Ball Joints found

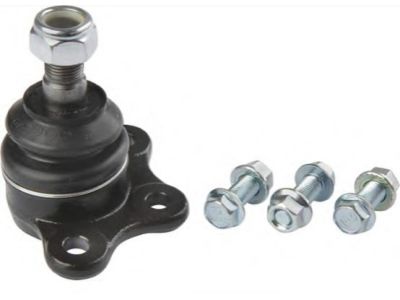
Honda Passport Joint Assembly, Ball (L/R)
Part Number: 8-94374-424-0$117.12 MSRP: $166.84You Save: $49.72 (30%)
Honda Passport Ball Joint
The Ball Joint is one of the most important components for Honda Passport automobiles because this component is located between the control arms and the steering knuckles in the suspension and steering systems. This component permits free rotation in several planes, and enables the vehicle to respond to road surface, and to steering direction. The Honda Passport Ball Joint usually presents a bearing stud, coupling to a socket, it is encased by a rubber boot so that it cannot had contaminants getting into it as well as receiving lubricants. Honda Passport vehicles being manufactured over the years has used both Loaded Ball Joint and Unloaded Ball Joint with the primary function of the former being the supporting of the vehicle's weight while the later is responsible for maintaining alignment albeit without any load support. The design of the equipment has also developed to the extent of containing sealed for life joints in order to minimize on modification and maximize on durability. Such options also fall under the performance-oriented category, these include adjustable ones to fit modified suspensions. In a nutshell, the Honda Passport Ball Joint plays a crucial role by ensuring vehicle stability, the way the car handle and even the comfort of the ride.
In search of affordable OEM Honda Passport Ball Joint? Consider browsing through our extensive inventory of genuine Honda Passport Ball Joint. Not only do we provide market-leading prices and a manufacturer's warranty, but we also pride ourselves on exceptional customer service and swift delivery.
Honda Passport Ball Joint Parts Questions & Experts Answers
- Q: How do you check and replace a balljoint on Honda Passport?A:In order to inspect a balljoint, lift the vehicle on a raising jack and then put it on safety stands, There are signs that tell that the rubber seal of this component is damaged and requires replacement, cuts, tears, or leaking grease. Have the driver pull on the wheel while you hold a large pry bar on the balljoint and try to rotate it as well as apply downward pressure between the Steering Knuckle and the arm; any movement is an indication of worn balljoint. Get an assistant to shake the tire as you inspect on the ball joint stud castellated nut for looseness, they are symptoms of a worn stud or a widened hole on the steering knuckle boss If the latter is the case, then both the steering knuckle and the balljoint will both have to be replaced. For replacement, support the vehicle on its wheels, place the jack beneath the lower Control Arm, and unlock the wheel. Turn the castellated nut a few times in anti-clockwise direction while keeping it in place to avoid violent separation between ball joint and steering knuckle. For 4WD models, a balljoint separating tool will be required in order to take the balljoint apart from the steering knuckle. Once the castle nut is loose and the balljoint separated from the steering knuckle some care must be taken in order to prevent the brake hose from being damaged by tightening the assembly. Take out all the nuts and bolts that holds the ball joint to the control arm, then pop it off. Assembling position the new Balljoint on the arm, fasten and torque the bolts and nuts to correct level. Place the balls of the balljoint stud into the slot of the steering knuckle boss, then engage the castellated nut and turn it until it is tight, and top it up with a new cotter pin which is inserted into one of the slots of the balls of the balljoint stud and not bent without undoing the castellated nut. Last put the wheel and the lug nuts, drop the car and then further tighten the lug nuts to its recommended torque.


