×
- Hello
- Login or Register
- Quick Links
- Live Chat
- Track Order
- Parts Availability
- RMA
- Help Center
- Contact Us
- Shop for
- Honda Parts
- Honda Accessories
My Garage
My Account
Cart
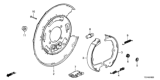
Genuine Honda Passport Brake Shoe Set
Brake Shoe- Select Vehicle by Model
- Select Vehicle by VIN
Select Vehicle by Model
orMake
Model
Year
Select Vehicle by VIN
For the most accurate results, select vehicle by your VIN (Vehicle Identification Number).
5 Brake Shoe Sets found


Honda Passport Shoe, Parking Brake
Part Number: 43153-TZ5-A01$32.39 MSRP: $45.75You Save: $13.36 (30%)

Honda Passport Shoe, Primary Parking Leading Brake
Part Number: 8-97087-949-1$54.42 MSRP: $76.88You Save: $22.46 (30%)
Honda Passport Shoe, Parking Brake (Gear Ratio 41/10)
Part Number: 8-97120-760-0$45.60 MSRP: $74.72You Save: $29.12 (39%)

Honda Passport Shoe Kit Brake, Rear
Part Number: 5-87831-723-1$69.12 MSRP: $141.57You Save: $72.45 (52%)

Honda Passport Brake Shoe Set
The Brake Shoe Set of Honda Passport vehicles are used in the drum brakes to produce force needed for braking system. Incorporated in the braking system, a set of shoes rub against inner surface of the drum and in doing so creates friction that slows down the car. The design entails having the shoes fixed to a backing plate and which are initially mounted on hydraulic pistons while having return springs to enable them to retract after performing the braking function. It has been also observed that the Honda Passport models have supported a broad range of Brake Shoe Set apart from non-servo and duo-servo. Both types are self-contained and activated, but duo-servo brakes provide better braking force because of the way they are designed, this causes the rotating drum to exert force on the shoe so as to make it tighter. The proper functioning of Brake Shoe Set is extremely vital for the Honda Passport vehicle and hence calls for periodic examination and servicing.
In search of affordable OEM Honda Passport Brake Shoe Set? Consider browsing through our extensive inventory of genuine Honda Passport Brake Shoe Set. Not only do we provide market-leading prices and a manufacturer's warranty, but we also pride ourselves on exceptional customer service and swift delivery.
Honda Passport Brake Shoe Set Parts Questions & Experts Answers
- Q: What precautions should be taken when replacing the Brake Shoe Set on a Honda Passport?A:Whenever the brake shoes are replaced, the retracting and hold-down springs should also be replaced due to the continuous heating and cooling cycle that causes them to lose tension over time, potentially allowing the shoes to drag on the drum and wear at an accelerated rate. Begin by loosening the wheel lug nuts, raising the rear of the vehicle, and securely supporting it on jack stands while blocking the front wheels to prevent rolling. Remove the rear wheels and the brake drum; if the drum is stuck due to corrosion, apply penetrating oil around the flange and studs, let it soak, and then tap around the studs and back edge to loosen it. If the drum is locked onto the shoes from excessive wear, knock out the plug in the access hole, use a screwdriver to push the actuator lever off the star adjuster, and back off the adjuster wheel to retract the shoes, ensuring to install a new plug afterward to keep water out. Clean the brake assembly with brake system cleaner, then inspect the brake drum for score marks, grooves, hard spots, and cracks; if worn or out-of-round, it can be resurfaced by a machine shop, and professionals recommend this whenever a brake job is done. If resurfacing is not an option, remove glazing with emery cloth or sandpaper. Repeat the process for the other rear brake assembly, then install the brake drums, pump the brake several times, and adjust the star wheels until the shoes slightly drag on the drums before backing off the adjuster. Install the rear wheels, secure the lug nuts, lower the vehicle, and tighten the wheel lug nuts to the specified torque. Finally, check the brake pedal position; if it approaches the floor, further adjustment is necessary, which can be achieved by backing up and making repeated stops to actuate the self-adjusters, and always test the brakes for proper operation before driving in traffic.

Related Honda Passport Parts
 Honda Passport Brake Dust Shields
 Honda Passport Brake Backing Plate
 Honda Passport Brake Drum
 Honda Passport Wheel Cylinder
 Honda Passport Parking Brake Shoe
 Honda Passport Wheel Seal
Browse by Year
2025 Brake Shoe Set 2024 Brake Shoe Set 2023 Brake Shoe Set 2022 Brake Shoe Set 2021 Brake Shoe Set 2020 Brake Shoe Set 2019 Brake Shoe Set 2002 Brake Shoe Set 2001 Brake Shoe Set 2000 Brake Shoe Set 1999 Brake Shoe Set 1998 Brake Shoe Set 1997 Brake Shoe Set 1996 Brake Shoe Set 1995 Brake Shoe Set 1994 Brake Shoe Set