- Hello
- Login or Register
- Quick Links
- Live Chat
- Track Order
- Parts Availability
- RMA
- Help Center
- Contact Us
- Shop for
- Honda Parts
- Honda Accessories

Why choose HondaPartsNow
- Optimal Shopping Experience
Want to buy parts for your Honda Ridgeline? Look no further than HondaPartsNow.com, the best place for Honda Ridgeline genuine parts. For years, all of our Honda Ridgeline auto parts and accessories have been expedited directly from dedicated dealers and backed by the manufacturer's warranty, so buying from HondaPartsNow.com is always risk-free.
- Dedicated Customer Service
Our first-class customer service team is committed to providing you with the best assistance possible. Dedicated representatives are standing by to assist you by email, live chat, or phone. Every effort is made to ensure your order for OEM Honda Ridgeline parts arrives fast no matter your location in the nation, so your vehicle is up and running and back on the road.
- Unbeatable Prices
What makes us the best online source for Honda Ridgeline parts and Honda Ridgeline truck parts? Our goal is to offer the lowest prices. You get giant savings shopping with HondaPartsNow.com. With a complete Honda Ridgeline parts catalog, we cover a full selection of affordable OEM Honda Ridgeline parts and pickup parts with a huge inventory.
Popular Genuine Honda Ridgeline Parts
- Electrical / Exhaust / Heater / Fuel Parts View More >
- Chassis Parts View More >
- Engine Parts View More >
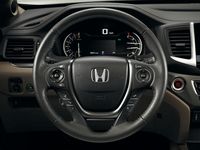
- Interior / Bumper Parts View More >
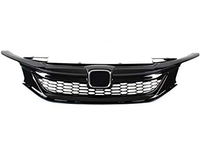
- Body / Air Conditioning Parts View More >
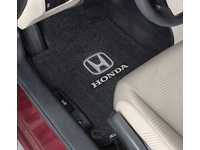
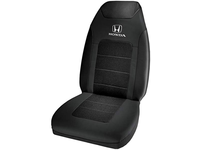
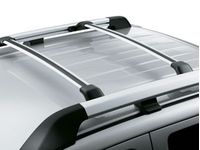
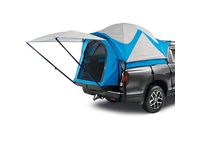
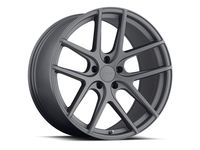
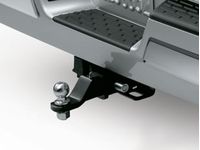
- Accessories View More >


Shop Genuine Honda Ridgeline Parts with HondaPartsNow.com
The Honda Ridgeline is a mid-size pickup truck that Honda, a Japanese automaker, launched in North America in March 2005. It was designed by Honda's Research and Development Americas engineering team and manufactured in Ontario, Canada. The Ridgeline shares production lines with other Honda models like the Acura MDX, CSX, Civic, and Civic Si. In its debut year, it was honored as the 2006 North American Car of the Year and Canadian Car of the Year in the truck category. The first-generation Ridgeline, released in 2005 for the 2006 model year, was Honda's first venture into the American pickup truck market. It targeted customers seeking a transition from sedans, minivans, or SUVs to pickup trucks. The first-gen Ridgeline offered standout features like firm front bucket seats, oversized side mirrors, 12 storage compartments, 6 cupholders, and boasted the best rear legroom in the mid-size pickup category. The first-generation model was discontinued in 2014. The second-generation Ridgeline, launched in June 2016 for the 2017 model year, introduced a new design based on the "global light truck platform". It retained many features of its predecessor and incorporated innovative cargo-carrying solutions. Honda enhanced the truck's front structure strength by 17%, rear sturdiness by 31%, and reinforced or changed 50% of the chassis components, reducing the weight by an average of 78 lb (35 kg). Despite a strong sales start, the second-generation Ridgeline saw a 12% decline in the subsequent year.
The Honda Ridgeline, an SUT that combines features of traditional trucks and pickups, faces typical problems after years of heavy-duty tasks such as hauling, towing, and loading. Engine issues often appear when a vehicle ages; however, premature failure can be avoided by paying attention to warning signs like a tapping sound while driving, white smoke on starting, rough running, reduced engine performance, or difficulty in starting. An illuminated Check Engine Light may require a thorough inspection of the oil filter, air filter, rod bearing, and oxygen sensor. Additionally, suspension and braking system failures are reported problems. If you notice a loud clicking sound when turning, difficulty controlling the vehicle due to a loose steering wheel, or unusual vibrations, it could indicate issues with the sway bar link, control arm, axle shaft, or sway bar bushing. Brake pad set and brake disc failures also contribute to braking issues. To ensure the overall longevity of your Ridgeline, invest more efforts into maintenance, including replacing the wiper blade every six months for optimal visibility. The antenna, headlights, and fog lights also require routine checks and maintenance.
Original equipment manufacturer parts excel in quality. Made from the finest materials to guarantee their durability, they are the top choice for maintaining your vehicle's peak performance. Furthermore, they are designed to adhere to official Honda factory specifications, ensuring effortless installation and a perfect fit. For your Honda Ridgeline, the best choice would be brand new OEM parts, like Transmission - Automatic. If cost is a concern, rest assured that we provide genuine Honda Ridgeline parts at the most competitive prices in the market. Don't miss this opportunity for quality and affordability.
Honda Ridgeline Parts Questions & Answers
- Q: How to remove and install a throttle body on Honda Ridgeline?A:Take the negative battery cable connection loose. Tighten the clamps on the two coolant hoses as close as possible to the throttle body. If you do not have the right tools, just drain engine coolant keeping it below the throttle body level. Remove the air intake duct. Unplug the wiring connection that attaches to the MAP sensor. Unplug the electrical connection for the throttle body. Pull off the two coolant hose connections from the throttle body, with a rag handy to catch any leftover coolant in the hoses or body. To remove the throttle body from its position on top of the manifold, take out both bolts holding the body to the manifold and the two nuts attaching it to the upper intake. First, get rid of both the throttle body and the gasket that goes between them. Installation is the reverse of removal. Plug the terminal to the battery's negative side, start the engine, and make sure no air or motor oil flows out. After cleaning everything up, look at the coolant and pour in more to match the right amount.
- Q: How to remove the front heater core on Honda Ridgeline?A:A licensed air conditioning technician must empty the air conditioning's refrigerant before you attempt to take out the front heater core. We do not need to take this step when removing the rear heater core. Pull out the black cable from the car's terminal that holds the negative battery charge. Drain the cooling system. First mark the position of your heater control cable, then remove it from the valve. Take off the heater hoses from where they connect to the heater core pipes at the firewall and close the heater core pipes with plugs to keep coolant from leaking out while you remove the heater unit. Remove the inlet and outlet hoses attached to the evaporator lines at the wall between the engine and passenger sections. Unscrew the nuts that hold the heater core and evaporator housing in place by the firewall at the engine front. Remove the instrument panel. First undo the bolts that fixed the evaporator housing to the heater housing. After that, pull the evaporator housing off. Loosen all the mounting bolts on the heater core housing. Then take care to move the assembly safely out of the passenger compartment. When ready, loosen and remove the straps that wire the heater core pipes. Gently remove the heater core from its place by holding it by the edges to let it cut free from the wall seal. Put the heater core and evaporator hoses back into place on the engine bay wall, just like when you took them off. Plug the cable back into the negative battery terminal and top up your car's cooling system. Ask the mechanic who took out your air to check and fix any leaks in your air conditioner. To get to the rear heater core, you must take out the middle console. Carefully take apart the heater hoses from the air conditioning/heating unit on the car's backside. Put a thick towel and plastic under the connections to gather any leaking coolant before you disconnect. Detach the two belts and the clamps that hold the pipes in position to free the heater core and right air conditioning/heating housing. Push up on the housing's right side only until you can take the water core out, and loosen the left side mounting bolts if needed. Installation is the reverse of removal. Plug the battery cable back to the negative terminal and top up the cooling system. Ask the store to check and test for leaks after they clean out your car's air conditioning system.
")
