×
- Hello
- Login or Register
- Quick Links
- Live Chat
- Track Order
- Parts Availability
- RMA
- Help Center
- Contact Us
- Shop for
- Honda Parts
- Honda Accessories
My Garage
My Account
Cart
Genuine 1999 Honda Prelude Engine
- Select Vehicle by Model
- Select Vehicle by VIN
Select Vehicle by Model
orMake
Model
Year
Select Vehicle by VIN
For the most accurate results, select vehicle by your VIN (Vehicle Identification Number).
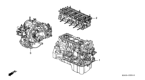
2 Engines found

 Product Specifications
- Other Name: General Assy., Cylinder Block
- Item Weight: 151.20 Pounds
- Item Dimensions: 27.0 x 27.5 x 23.4 inches
- Condition: New
- Fitment Type: Direct Replacement
- SKU: 10002-P5P-A02
- Warranty: This genuine part is guaranteed by Honda's factory warranty.
- Product Specifications
- Other Name: General Assy., Cylinder Block
- Item Weight: 166.20 Pounds
- Item Dimensions: 27.8 x 27.2 x 23.2 inches
- Condition: New
- Fitment Type: Direct Replacement
- SKU: 10002-P5M-A23
- Warranty: This genuine part is guaranteed by Honda's factory warranty.
1999 Honda Prelude Engine
Our website is the optimal online store for when you need any genuine 1999 Honda Prelude Engine. We offer a wide range of 1999 Honda Prelude Engine at unbeatable prices. We will help provide you with a worry-free shopping experience at highly competitive prices. In addition, all OEM parts are backed by the manufacturer's warranty.
1999 Honda Prelude Engine Parts Questions & Experts Answers
- Q: What are the key steps and considerations for removing and installing an engine on 1999 Honda Prelude?A: During the process of engine removal you will use a number of tasks that are related to the separation of some components or systems, for example, the extraction of the exhaust system or the radiator. Because there are so many models and engines, it is impossible to enumerate all the wires and hoses that require disconnection, sound judgment should be applied. To facilitate engine removal and installation, consider these key points: include proper draining of fluids, proper labeling of wires and hoses before disconnecting them, properly storing and labeling retainers so that they are not mixed up with other parts, proper supporting of the transmission or transaxle, have a professional handle air conditioning connections and removal, ensure that all the lifting points are properly engaged on the engine before lifting. When lifting the engine, do it gently and ensure you look at the remaining connections; then once you remove the engine put it on a stand or workbench. On specific models, then start by securing the hood, then turning off the battery cables, then you remove the battery and its base, and then demating a number of cables and hoses such as the throttle control and the cruise control cables. Before disconnecting any fuel line always reduce the pressure in the fuel system, also before starting make sure anything that is in the vicinity of the work area such as the power steering pump and the alternator are either disconnected or moved out of the work area. Removal of various components such as fluids, the radiator, exhaust pipe and various others, ensure the engine compartment is not connected to anything before lifting the engine. In terms of installation, the removal process is followed in the reverse manner, paying attention to the fact that all the parts fit properly before tightening the mounts, where necessary, and reconnecting all the cables, hoses, and components, including the filling of fluids after engine startup, of course, and checking for leaks.
Related 1999 Honda Prelude Parts
 1999 Honda Prelude Camshaft Seal
 1999 Honda Prelude Valve Cover Gasket
 1999 Honda Prelude Cylinder Head Gasket
 1999 Honda Prelude Oil Pan
 1999 Honda Prelude Cylinder Head
 1999 Honda Prelude Exhaust Manifold Gasket
 1999 Honda Prelude Intake Manifold Gasket
 1999 Honda Prelude Camshaft
 1999 Honda Prelude Crankshaft
 1999 Honda Prelude Transmission Assembly
 1999 Honda Prelude Engine Block
 1999 Honda Prelude Transmission Gasket