×
- Hello
- Login or Register
- Quick Links
- Live Chat
- Track Order
- Parts Availability
- RMA
- Help Center
- Contact Us
- Shop for
- Honda Parts
- Honda Accessories
My Garage
My Account
Cart
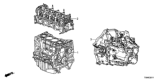
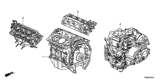
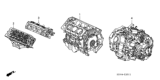
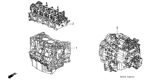
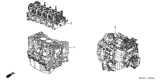
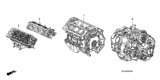
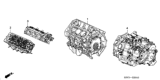
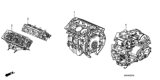
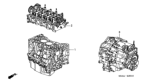
Genuine Honda Transmission Assembly
Trans Assembly- Select Vehicle by Model
- Select Vehicle by VIN
Select Vehicle by Model
orMake
Model
Year
Select Vehicle by VIN
For the most accurate results, select vehicle by your VIN (Vehicle Identification Number).
634 Transmission Assemblies found


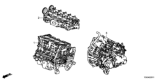
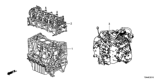
Honda Bare, Transmission Assembly
Part Number: 20011-5DE-R00$8470.67 MSRP: $11282.94You Save: $2812.27 (25%)Product Specifications- Replaced by: 20011-5DE-R01

 Product Specifications
- Other Name: ATR KIT
- Replaces: 06200-52N-C00RM, 06200-52N-A03RM, 06200-52N-A01RM, 06200-52N-A00RM, 06200-52N-A02RM, 06200-52N-C01RM, 06200-52N-C02RM, 200CP-52N-A01RM, 200CP-52N-C01RM, 200CP-52N-A02RM, 200CP-52N-C00RM, 200CP-52N-A00RM, 200CP-52N-C02RM

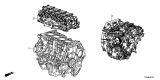
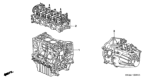
Honda Automatic Transmission Assembly
Part Number: 20021-PLX-L03$2419.94 MSRP: $3418.68You Save: $998.74 (30%)Product Specifications- Other Name: Transaxle
Honda Warranty Automatic Transmission Kit
Part Number: 06200-52P-A70RM$4788.16 MSRP: $6377.83You Save: $1589.67 (25%)Product Specifications- Replaces: 06200-52P-C70RM, 200CP-52P-A70RM
 Product Specifications
- Other Name: Transaxle
- Replaces: 20011-5DE-R00

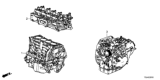
Honda Transmission Assembly
Part Number: 20011-RY1-P30$5901.36 MSRP: $7860.62You Save: $1959.26 (25%)Product Specifications- Other Name: Transaxle
- Replaces: 20011-RY1-P40
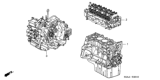
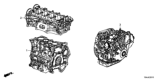
Honda Transmission Assembly
Part Number: 20021-RV1-000$11586.58 MSRP: $16368.50You Save: $4781.92 (30%)Product Specifications- Other Name: Transaxle

Honda Automatic Transmission Assembly
Part Number: 20021-RAY-A51$2881.06 MSRP: $4070.11You Save: $1189.05 (30%)Product Specifications- Other Name: Transmission Assembly (Automatic)
 Product Specifications
- Other Name: ATR KIT
- Replaces: 200CP-5EZ-A33RM, 200CP-5EZ-A32RM, 06200-5EZ-A32RM, 06200-5EZ-A33RM

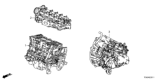
Honda Automatic Transmission Assembly
Part Number: 20021-RCL-A10$3003.91 MSRP: $4243.67You Save: $1239.76 (30%)Product Specifications- Other Name: Transmission Assembly (Automatic)

Honda Automatic Transmission Assembly
Part Number: 20021-R5R-A01$5634.70 MSRP: $7960.21You Save: $2325.51 (30%)Product Specifications- Other Name: Transaxle

Honda Bare, Transmission Assembly
Part Number: 20011-RPN-326$9210.63 MSRP: $12268.58You Save: $3057.95 (25%)Product Specifications- Replaces: 20011-RPN-316, 20011-RPN-306

Honda Transmission Assembly (Manual Transaxle)
Part Number: 20011-5C8-A50$9392.03 MSRP: $12510.21You Save: $3118.18 (25%)Product Specifications- Other Name: Transaxle

Honda Transmission Assembly (Manual Transaxle)
Part Number: 20011-5CD-J50$6166.55 MSRP: $8213.84You Save: $2047.29 (25%)Product Specifications- Other Name: Transmission Assembly (Mt)
- Replaced by: 20011-5CD-J52
Honda Automatic Transmission Assembly
Part Number: 20021-RCL-L50$2320.12 MSRP: $3277.66You Save: $957.54 (30%)Product Specifications- Other Name: Transmission Assembly (Automatic)

Honda Transmission Assembly
Part Number: 20021-R36-000$4131.98 MSRP: $5837.30You Save: $1705.32 (30%)Product Specifications- Other Name: Transaxle
- Product Specifications
- Other Name: Transmission Assembly (Automatic)

 Product Specifications
- Other Name: Transaxle

 Product Specifications
- Other Name: Transaxle
| Page 1 of 32 |Next >
1-20 of 634 Results
About Honda Transmission Assembly
A Honda Transmission Assembly needs to be kept in good working condition in your vehicle. The online catalog we provide will get you through the ordering process safely and securely. All genuine Honda Transmission Assemblies from us are shipped directly from authorized Honda Dealer. If you want search for Honda Transmission Assembly fast and easily, just come to Hondapartsnow.com to look for your parts.
Honda Transmission Assembly Parts Questions & Experts Answers
- Q: What are the guidelines for overhauling a Transmission Assembly on a Honda CRX?A:Texas aerospace forums stress the importance of cleanliness for DIY manual transaxle overhaul; the exterior must be washed free from dust, preferably with a high-point pressure washer so that there is no deposit of dirt on the inside components. Each of the elements belonging to it should be cleaned with solvent and thereafter, dried by blowing from compressed air not with cloths or rags. As for lube seals, use clean transaxle oil; for thrust washers, use unmedicated petroleum jelly in order not to leave toxic materials behind. When using bolts in aluminum parts, it is recommended that thread should be washed in clean transaxle oil or use of an anti-seize compound to avoid galling. During disassembly some bolts and various components are removed in accordance with the specific sequence prescribed by the manufacturer; clearances are always checked and restricted are replaced. Regarding the mainshaft and countershaft, there are specific step-by-step instructions for its removal and subsequent inspection; measuring its clearances, and replacing them if necessary. Sealant should be used on the mating surface and also components should be fitted in the right sequence and tightness predetermined. Backlash and preload should always be tested and regulated especially the tooth contact and clearance during the assembling of the gears. Last but not the least, pour oil into the unit and then place them in the vehicle.
- Q: How tossues with a Transmission Assembly be diagnosed before repair work on a Honda Odyssey?A:Where a problem is identified, the nature of the problem whether electrical, mechanical or hydraulic shall have to be ascertained before contemplating repair. Diagnosis is a complex process that involves understanding how trans axle functions and what parts it is made up from, plus the ability to get hold of test equipment, all of which means that diagnosis is outside the Vehicle Inspection General Guide. Problems with the automatic trans axle have to therefore be handled by a dealer service department or any other repair facility as appropriate. Remember that in no account should a faulty trans axle be removed prior to the car having been diagnosed by an informed mechanic with the necessary implements as troubleshooting can only be done with the trans axle properly connected to the vehicle.
- Q: How to remove and install the Transmission Assembly on a Honda Prelude?A:Disconnect the negative and then the positive battery cables from the battery, shift the transaxle into N, remove the battery hold-down and battery, drain the transaxle fluid and reinstall the drain plug with a new crush washer, remove the air intake duct, air cleaner case, and resonator, disconnect the connector from the vacuum tank and remove the vacuum tank and tank bracket without removing the vacuum lube, disconnect the transaxle-to-body ground cable, remove the battery base with the ground cable and battery base stay, disconnect the lock-up control solenoid valve and shift control solenoid valve connectors, disconnect the throttle control cable from the throttle control lever, detach the Counter shaft Speed Sensor connector, unplug the Vehicle Speed Sensor connector, remove the rear stiffener, then remove the Vehicle Speed Sensor and Power Steering Speed sensor without disconnecting the power steering pressure hoses, disconnect the ATF cooler hoses at the joint pipes while turning the ends of the cooler hoses upward to prevent fluid loss and plug the joint pipes, remove the starter motor, upper transaxle housing mounting bolts, loosen the front engine mount bracket bolts, remove the transaxle mount, raise and support the vehicle safely, remove the front wheels, remove the splash shield, subframe center beam, and rear beam stiffener, remove cotter pins and castle nuts from the lower ball joints using a press-type ball joint tool to separate the ball joints from the lower arm, remove the damper fork bolts and separate the damper fork and damper, use a suitable pry tool to separate the right and left halfshafts from the differential, pull on the inboard joint and remove the right and left halfshafts while tying plastic bags over the halfshaft ends to protect the boots and splined shafts, remove the right damper pinch bolt and separate the right damper fork from the strut, remove the right radius rod bolts and nut, remove the radius rod, remove the torque converter cover and shift cable cover, remove the control lever lock bolt and shift cable with the lever without bending the shift control cable, wire the cable to the underbody of the vehicle out of the work area, remove the driveplate bolts while rotating the crankshaft, place a transaxle jack below the transaxle and raise it enough to take the weight off the mounts, remove the intake manifold bracket, lower transaxle housing mounting bolts, and lower rear engine mounting bolts, pull the transaxle away from the engine until it clears the dowel pins, and lower the transaxle out of the vehicle. For installation, use new self-locking nuts for the front suspension components, new set rings on the halfshaft inboard joints, and new self-locking bolts for the subframe beams, available from a Honda dealer, flush the transaxle cooling lines before installing the transaxle using a pressurized flushing canister with biodegradable flushing fluid, fill the flusher with 21 ounces of fluid, pressurize to 80-120 PSI, clamp the discharge hose to the cooler return line, clamp the drain hose to the cooler inlet line, connect the flusher to air and water lines, open the flusher water valve and flush the cooler for ten seconds, depress the flusher trigger to mix flushing fluid with water, flush for two minutes, reverse the hose and flush in the opposite direction, dry the cooler lines with compressed air, install the starter motor onto the transaxle case, install the torque converter with a new hub O-ring, tighten the starter bolts to 33 ft. lbs., place the transaxle on a transaxle jack and raise it to the level of the engine, align the transaxle to the engine and install the transaxle housing mounting bolts and lower rear engine mounting bolts, tighten the rear engine mounting bolts to 40 ft. lbs. and the transaxle mounting bolts to 47 ft. lbs., install the intake manifold bracket and tighten the bolts to 16 ft. lbs., tighten the front engine mount bracket bolts to 28 ft. lbs., install the transaxle mount and tighten the bolt to 47 ft. lbs. and the nuts to 28 ft. lbs., remove the transaxle jack, attach the torque converter to the driveplate and install the mounting bolts, turn the crankshaft to rotate the driveplate, tighten the bolts in two steps, first to 4.5 ft. lbs. in a crisscross pattern and finally to 9 ft. lbs., check for free rotation after tightening the last bolt, install the shift cable onto the control shaft and tighten the lock bolt to 10 ft. lbs., install the torque converter cover and shift cable cover, install a new set ring onto the inboard joint of each halfshaft, install the damper fork bolts and ball joint nuts to the lower arms, tighten the ball joint nut to 47 ft. lbs. and install a new cotter pin, install the radius rod and connect the damper fork while only hand-tightening the radius rod and damper fork fasteners, turn the right steering knuckle fully outward and slide the axle into the differential until the spring clip engages the differential side gear, repeat on the left side, install the subframe rear beam stiffener and center beam, tighten the stiffener bolts to 28 ft. lbs. and the subframe center beam bolts to 43 ft. lbs., install the front wheels and lower the vehicle, use a floor jack to place the weight of the vehicle onto the right front knuckle, tighten the radius rod bolts to 76 ft. lbs. and the nut to 40 ft. lbs., tighten the damper pinch bolt to 32 ft. lbs., tighten the nut to 47 ft. lbs. while holding the damper fork bolt, remove the floor jack, install the speedometer sensor and tighten the sensor bolt to 9 ft. lbs., connect the ATF cooler hoses to the joint pipes, connect the lock-up control solenoid and shift control solenoid valve connectors, attach the VSS and PSS sensor connectors, connect the starter motor cables and install the battery base and base stay, connect the ground cables on the body and transaxle, install the vacuum tank, tank bracket, and connect the tank connector, install the resonator, air cleaner case, and air intake duct, refill the transaxle with ATF using only Honda Premium ATF or an equivalent DEXRON II ATF, connect the negative and positive battery cables, leave the flusher drain hose attached to the cooler return line, with the transaxle in park, run the engine for 30 seconds or until approximately one quart of fluid is discharged, remove the drain hose and reconnect the cooler return line, refill the transaxle to the proper level with ATF, start the engine, set the parking brake, and shift the transaxle through all gears three times, check for proper control cable adjustment, on Preludes equipped with 4WS, turn the steering wheel lock-to-lock to reset the steering control unit, check and adjust the front wheel alignment, let the engine reach operating temperature with the transaxle in N or P, then turn the engine off and check the fluid level, after road testing the vehicle, loosen the front engine mount bolts and tighten them to 28 ft. lbs., and enter the radio security code. For shift linkage adjustment, remove the lower right steering column access hole cover, shift the transmission to N, remove the shift cable end lock pin from the adjustable cable end, check the alignment of the hole in the cable end with the linkage adjusting rod, if not aligned, loosen the cable end lock nut and adjust until aligned, reinstall the lock pin, ensure the lock pin snaps firmly into place, move the gear selector through each gear position and verify the operation of the gear position indicators, insert the ignition key into the key cylinder on the upper steering column cover and check that the shift lock lever releases. For throttle linkage adjustment, start the engine and allow it to run in P at 3,000 RPM until the radiator fan comes on, then allow the engine to idle, check the throttle cable side-to-side deflection, which should be 3/7-1/2 inches, and if not within specification, loosen the locknut and adjust the throttle cable as necessary.
")

")
Related Honda Parts


Browse by Model
Accord Hybrid Transmission Assembly Accord Transmission Assembly Civic Hybrid Transmission Assembly Civic Transmission Assembly Clarity Plug-In Hybrid Transmission Assembly CR-V Hybrid Transmission Assembly CR-V Transmission Assembly CR-Z Transmission Assembly Crosstour Transmission Assembly CRX Transmission Assembly Del Sol Transmission Assembly Element Transmission Assembly Fit Transmission Assembly HR-V Transmission Assembly Insight Transmission Assembly Odyssey Transmission Assembly Passport Transmission Assembly Pilot Transmission Assembly Prelude Transmission Assembly Ridgeline Transmission Assembly S2000 Transmission Assembly