×
- Hello
- Login or Register
- Quick Links
- Live Chat
- Track Order
- Parts Availability
- RMA
- Help Center
- Contact Us
- Shop for
- Honda Parts
- Honda Accessories
My Garage
My Account
Cart
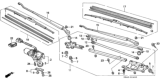
Genuine Honda Del Sol Wiper Motor
Windshield Wiper Motor- Select Vehicle by Model
- Select Vehicle by VIN
Select Vehicle by Model
orMake
Model
Year
Select Vehicle by VIN
For the most accurate results, select vehicle by your VIN (Vehicle Identification Number).
1 Wiper Motor found

Honda Del Sol Wiper Motor
The Honda Del Sol Wiper Motor provides the force behind sweeping the coupe's blades across the glass to keep the driver's vision clear when clouds are open. This electric unit converts the electric power from the battery into rotational motion and then, via a small gear set and linkage, also converts the rotational motion into the back and forth wipe you see. Two speed settings allow drivers to select a gentle pass for drizzle or a rapid sweep when downpours hit, and the Wiper Motor will automatically change direction at each of the arc's edges. Over the life of the Honda, two versions appeared: brand new assemblies from the factory and refurbished units that reuse the housing but get updated parts so output meets current standards. A refurbished Wiper Motor is a budget and recycling boost, as well as a brand new Wiper Motor with untouched components, but both will bolt up to the same points. Tight sealing keeps the Honda unit safe from moisture, and the Del Sol electrical system provides steady current for years. When snow surprises a parked Del Sol, the robust Wiper Motor awakens with full torque, and every Del Sol driver counts on the Honda design to keep rain at bay.
In search of affordable OEM Honda Del Sol Wiper Motor? Consider browsing through our extensive inventory of genuine Honda Del Sol Wiper Motor. Not only do we provide market-leading prices and a manufacturer's warranty, but we also pride ourselves on exceptional customer service and swift delivery.
Honda Del Sol Wiper Motor Parts Questions & Experts Answers
- Q: How to check and replace a windshield wiper motor on Honda Del Sol?A:To check the windshield wiper motor, disconnect the electrical connector from the wiper motor assembly. Use jumper wires to apply battery voltage to the B terminal (green/black wire) and ground the Lo terminal (blue wire) to see if the wiper operates at low speed. Then connect the battery positive terminal to the B terminal and the negative terminal to the Hi terminal (blue/yellow wire) to check for high-speed operation. If the motor does not run at either speed, it needs replacement. For replacement, detach the wiper arms by removing the acorn nut and pulling the arm off its splined shaft. Remove the hood seal and cowl panel by prying off trim clips and removing screws, then unplug the electrical connector. Take out the four mounting bolts for the wiper motor and linkage frame, turn the frame assembly over for access, and remove the retaining nut to detach the linkage from the motor. Next, remove the three mounting bolts to separate the motor from the wiper linkage. Installation involves reversing the removal steps, ensuring to lubricate the contact points of the wiper linkage with multi-purpose grease before installing the new motor assembly. For the rear wiper motor, open the lift gate and remove the wiper motor cover, then disconnect the electrical connector. Use jumper wires to apply battery voltage to the no. 2 terminal (green/black wire) and ground the number 4 terminal (green wire) to check if the wiper runs smoothly; if not, it should be replaced. For replacement, detach the wiper arm and remove the rubber seal, shaft nut, and washer. Open the lift gate, remove the wiper motor cover, and unplug the electrical connector. Support the motor with one hand while removing the three retaining nuts, then lower the wiper motor from the vehicle. Installation follows the reverse order of removal.
")


