- Hello
- Login or Register
- Quick Links
- Live Chat
- Track Order
- Parts Availability
- RMA
- Help Center
- Contact Us
- Shop for
- Honda Parts
- Honda Accessories

Why choose HondaPartsNow
- Unbeatable Prices
HondaPartsNow.com is your prime online source for discounted prices. We offer high-quality options for your vehicle that can't be found anywhere else. HondaPartsNow.com offers genuine parts at discounted prices, allowing you to keep your vehicle running at its peak without straining your budget.
- Dedicated Service
HondaPartsNow.com ranks second to none in devoted customer service. We strive to exceed the customer's expectations and build relationships with the customers. We are always ready to assist you with any inquiry or detail about your vehicle's parts and accessories.
- Rapid Delivery
HondaPartsNow.com is devoted to combining genuine Honda CR-V parts and accessories with fast and affordable shipping. Most items listed in our catalog are in stock and are shipped out promptly after the order has been successfully processed. This guarantees you receive the parts your vehicle needs without needing to leave your home in just a matter of days.
Popular Genuine Honda CR-V Parts
- Electrical / Exhaust / Heater / Fuel Parts View More >
- Chassis Parts View More >
- Engine Parts View More >
- Interior / Bumper Parts View More >
- Body / Air Conditioning Parts View More >
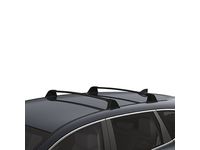
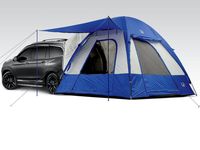
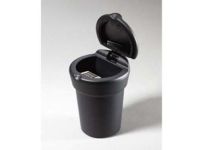
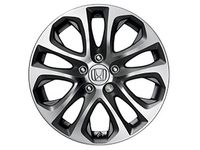
- Accessories View More >


Shop Genuine Honda CR-V Parts with HondaPartsNow.com
Honda CR-V is a small-size SUV manufactured in 1995. The third generation model was launched in 2006, the fourth in Japan in 2011, and the fifth in 2017. The larger and heavier 2nd generation Honda CR-V (chassis codes RD4-RD8) is based on the 7th generation Civic's platform completely redesigned and powered by the K20A1/24A1 engine. Despite the increased power, the new CR-V retains the fuel economy of previous models, in part due to the availability of the i-VTEC engine system. The newly developed chassis features increased torsional and flexural rigidity, while the new suspension features front-end control-link MacPherson struts and rear multi-link double A-arms. The fourth generation features a 2.4-liter i-VTEC inline four-cylinder engine, which is boosted to 190ps/22.6kg-m to cater to the increasing weight of the car, and a new all-wheel-drive (AWD) with an electronic intelligent control system to improve the four-wheel-drive problems of the previous three generations. All this generation of Honda CR-Vs is equipped with a 5-speed automatic transmission. With an overall length/width/height (mm) of 4,570/1,855/1,680, the fifth-generation Honda CR-V was first officially launched in Detroit in October 2016 and was scheduled to go on sale in North America in December for the model year. The Earth Dream 2.4-liter i-VTEC natural-intake engine with 184hp and 180lb-ft is also used in some regional entry models.
The Honda CR-V, while not as renowned as the Civic or Accord, has garnered substantial popularity. However, owners should be aware of common issues. One major complaint is unwanted acceleration while braking, often mistaken as a brake issue when it is primarily engine-related. Symptoms include a burning odor during braking, unexpected acceleration, and engine misfire, along with excessive oil consumption leading to decreased engine performance. These signs, along with an illuminated Check Engine Light, may indicate issues with the air filter, oil filter, timing cover gasket, or drive belt. Suspension failure is another prevalent issue, leading to unpleasant driving experiences due to excessive vibration and difficulty in controlling the vehicle. If clunking or rattling noises are heard from the tire area, and uneven tire wear is noticed, parts such as the sway bar link, sway bar bushing, and control arm bushing may need repair. Aside from these major concerns, other parts like the door lock actuator, brake pad set, cabin air filter, and wiper blades can wear down easily and should be maintained regularly to ensure the longevity and performance of your CR-V.
Original equipment manufacturer parts are the best in terms of quality. Manufactured using the top materials to ensure their durability, genuine parts are the #1 choice to keep your vehicle at peak performance. They are also designed to match official Honda factory specifications for easy installation and a snug fit. We offer a wide variety of genuine Honda CR-V parts, such as Transmission - Automatic, Transmission - Manual at the most competitive prices online. Our OEM Honda CR-V parts come with the assurance of a manufacturer's warranty, alongside a hassle-free return policy and prompt delivery service, ensuring a worry-free shopping experience.
Honda CR-V Parts Questions & Answers
- Q: How to Remove and Install a Tie Rod End on a Honda CR-V?A:Loosen wheel lug nuts, raise vehicle and support on jackstands. Apply parking brake and block rear wheels. Using back-up wrench, loosen jam nut and mark tie-rod end position. Remove cotter pin and loosen nut from ballstud. Disconnect tie-rod end from steering arm with puller. Separate tie-rod end from steering knuckle and unscrew from tie-rod. Thread tie-rod end onto tie-rod and connect to steering arm. Install nut on ballstud and tighten. Install new cotter pin. Tighten jam nut and install wheel. Lower vehicle and tighten lug nuts. Check and adjust front end alignment if necessary.
- Q: How to Remove and Install a Front Shock Absorber on a Honda CR-V?A:Loosen the wheel lug nuts, raise the vehicle and support it securely on jackstands, then remove the wheels. Unbolt the brake hose bracket from the strut and detach the speed sensor wiring harness from the strut by removing the clamp bracket bolt. Remove the stabilizer bar link from the strut, mark the position of the strut to the steering knuckle, then remove the strut-to-knuckle nuts and bolts. Remove the access cover from the cowl panel, then remove the three upper nuts securing the strut assembly to the body. Separate the strut from the steering knuckle and remove it. Check the strut body for leaking fluid, dents, cracks and other obvious damage which would warrant repair or replacement. Check the coil spring for chips or cracks in the spring coating and inspect the spring seat for cuts, hardness and general deterioration. Guide the strut assembly up into the fenderwell and insert the upper mounting studs through the holes in the body, then install the nuts. Slide the steering knuckle into the strut flange and insert the two bolts, install the nuts, align the previously made matchmarks and tighten them to the torque. Install the wheel and lug nuts, then lower the vehicle and tighten the lug nuts. Tighten the upper mounting nuts and install the cowl panel cover. Have the front end alignment checked and, if necessary, adjusted.
- Q: How to Replace a Front Sway Bar Kit and Sway Bar Bushing on a Honda CR-V?A:Before changing the ball joint, loosen the front lug nuts first, lift up the front part of the vehicle, and set it on jackstands with good support. Park your car in gear. Block the rear wheels to keep the car from slipping down the ramp. Then take off the front wheels. Unscrew the nuts holding the stabilizer bar links to both arms and the Sway Bar Kit using an Allen key to keep the ballstud from turning. Untwist the bar links linking the control arm and the bar, and remove each of the nuts. Reconnect everything backwards step by step when you're done, tightening standards on each joint. Take out the guard from below the driver's footwell. Unhook the steering column from the steering gear, being careful not to turn the steering wheel, to save the airbag clockspring from damage. Begin by disconnecting the stabilizer bar links from the control arms, balljoints from the steering knuckles, tie-rod end from the steering knuckle, taking off under-vehicle splash guards, and removing the front part of your exhaust system. For AWD models, remove the driveshaft. Use a floor jack to hold the subframe from the back side, take out the bolts for the rear and mid subframe, loosen the bolts for the front subframe by about 1-3/16 inches. Loosen and remove the bolts that connect the torque rod to engine, then pull the subframe down 5-18 inches. When removing the bracket bolts, line up the slit in each rubber bushing with how they were before. Look for cracks, tears, or altered Sway Bar Bushing, their retainers, and worn or bad stabilizer bar links. Unbolt the bracket and carefully detach ruined stabilizer bar bushings, release the bushing from the bar, then carefully pull foldable retainer clips apart. Put fresh bushings into place, making sure the slits line up the same way as before. Push the stabilizer bar into place, fasten the bushing brackets with their bolts, lift up the subframe, and bolt down the parts alongside the torque rod bolts. Link the stabilizer bar to the lower control arms, tighten the nuts connecting the balljoints to control arms, install wheels with back nuts, drive down and tighten the lug nuts. Finish by inspecting and then readjusting your front-end alignment, if needed.


